Tuesday, March 28, 2006

Refugium plans

A refugium is defined as: [A separate tank which shares water and filtration with the main aquarium. Used for growing Nitrate reducing Algae, raising live food, and isolating inhabitants from the main tank]

As this is an ideal place for natural fauna to grow and supplement the natural food available for reef tank inhabitants, therefore in an ideal world the fuge is situated above the tank so the critters can be passed down via gravity and do not have to face the wrath of the sump return pump impellor.

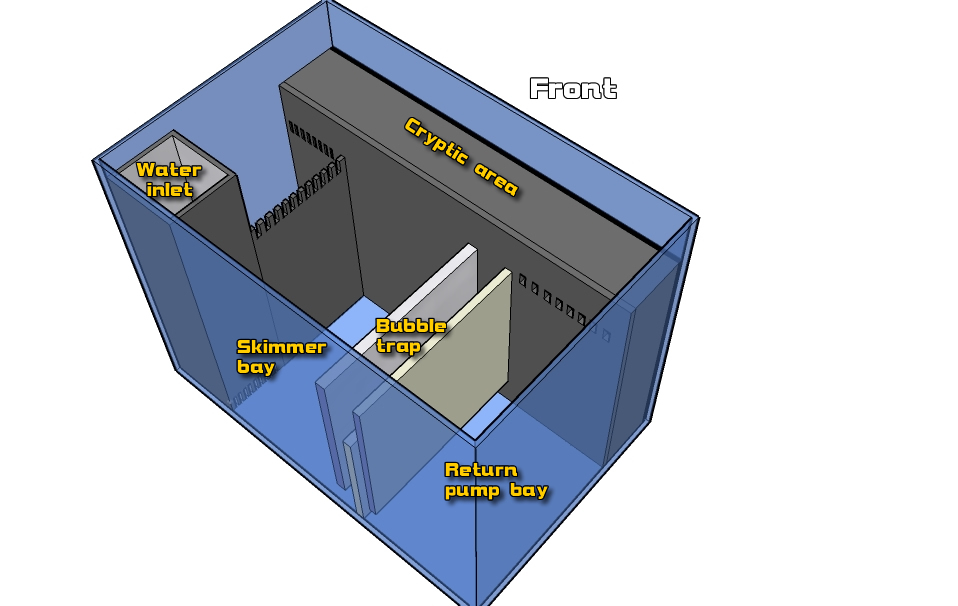
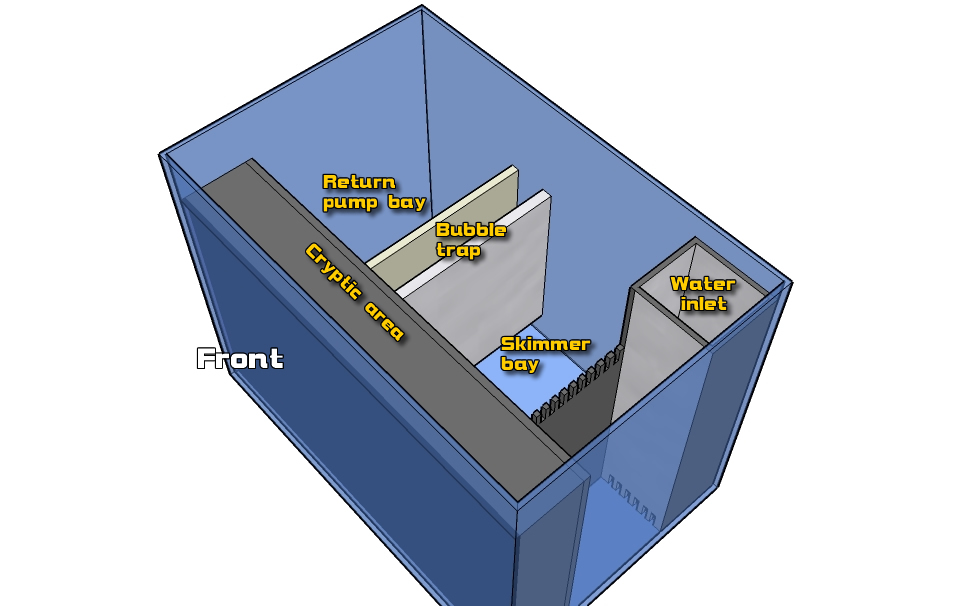
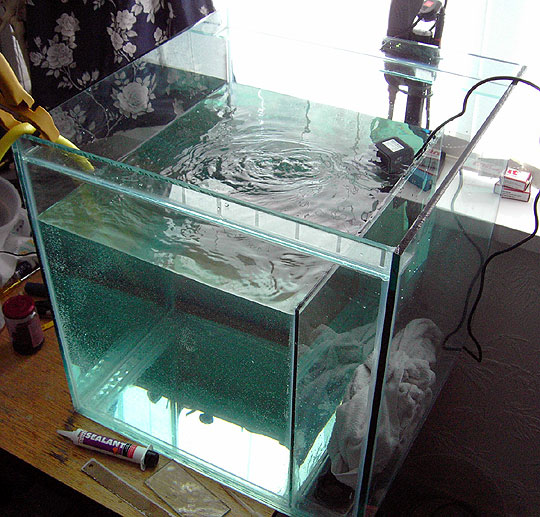
However, not having the luxury of an above the tank fuge, i have opted to install a fuge on a shelf, above the sump. The critters will then be returned into the bubble trap of the sump (bypassing the skimmer) and only have to face the wrath of one pump. There will be critter loss, but hopefully some will make it through.
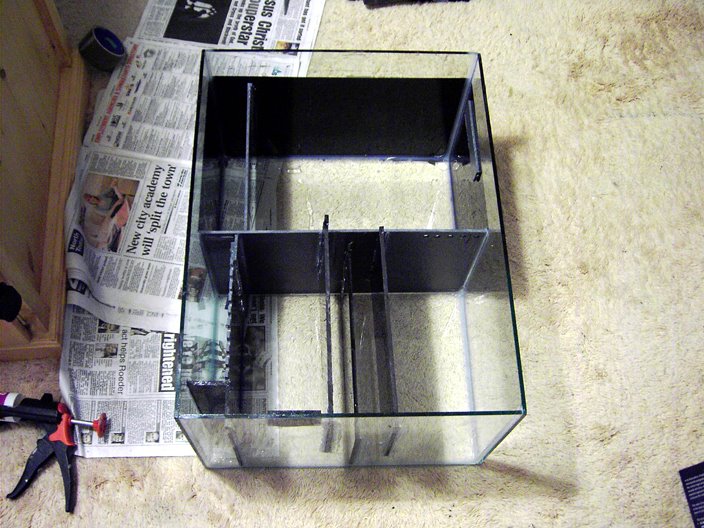
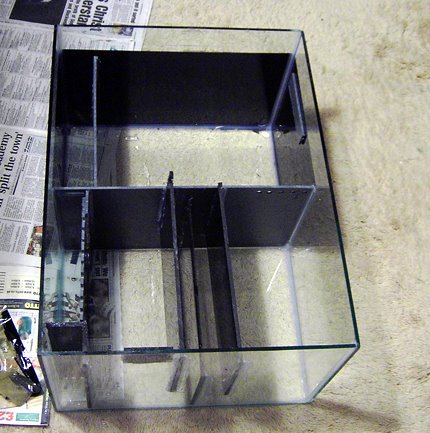
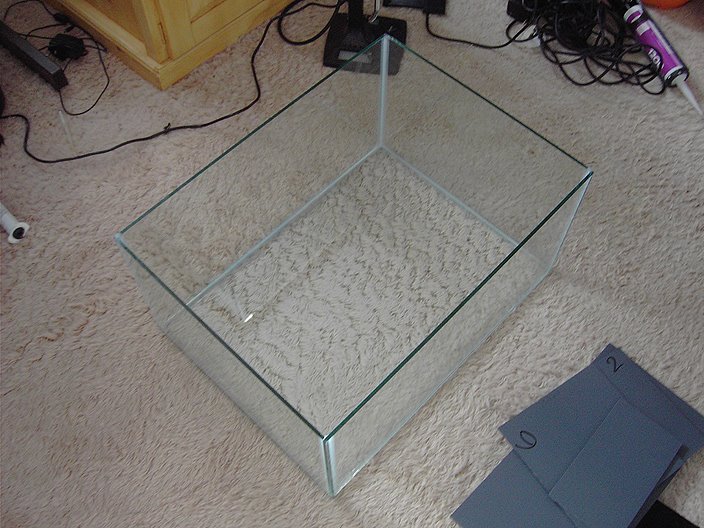
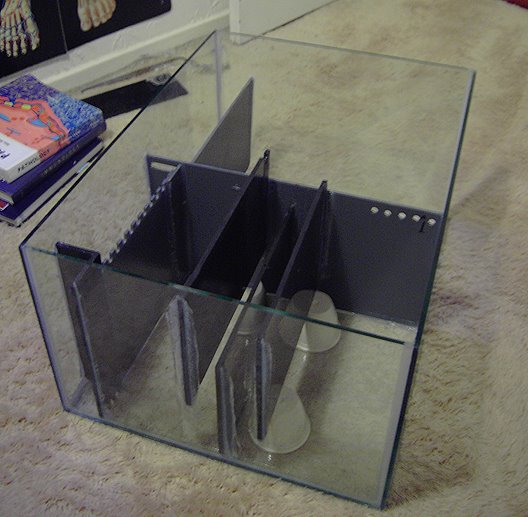
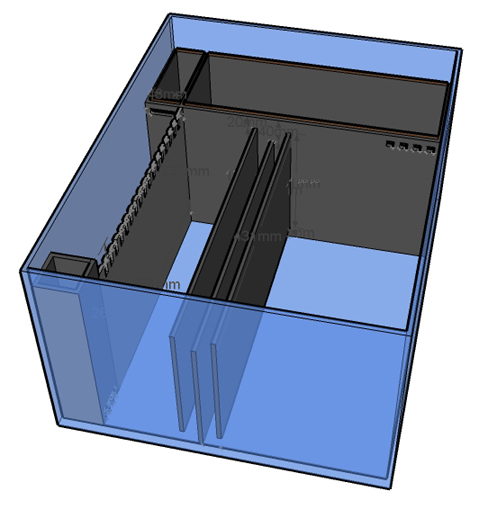
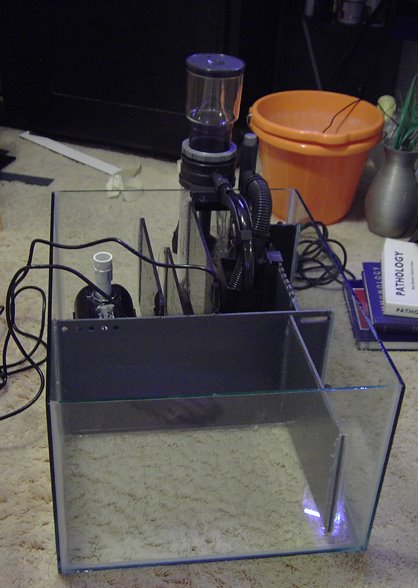
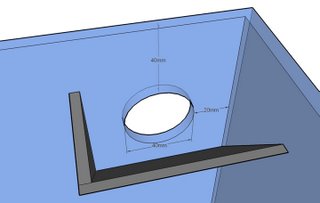
Here are the plans;-

Monday, March 27, 2006

SCWD

Tested the tank tonight with freshwater and everything worked well. I am still waiting on rigid pipe to hard plumb the return from the sump, so i improvised with hose.


The water returned from the sump goes ...

OR3500 >> Check valve >> ball valve >> SCWD >> Hydor Flo rotating nozzles (x2)

The SCWD (Switching Current Water Director) pronounced ("squid") acts to flip water flow between the two rotating nozzles, giving me a maximum random waveform flow pattern.


Below is a video of the SCWD in action, i have attached one rotating nozzle so you can see how it compares with the normal linear outlet jet.

<< Clicky

Sunday, March 26, 2006

Blackout

I used Wicks Black non-drip Master gloss to paint the outside of the cryptic area and also to paint the overflow section of the cube, thereby hiding all the guts.

Please ignore the mess, and items in random places ;)

Sump (cryptic area needs a roof now)


Tank


Saturday, March 25, 2006

Sump build

Picked braceless sump tank up from AC aquatics today, great service as usual :)


In accordance with the sump plans i constructed it.


It was really helpful using the CGI model i created with Sketch-up, as i could refer to it to determine dimensions, and rotate, zoom etc to get a better perspective. I would defo recommend it!


Sump with stuff in.

Wednesday, March 15, 2006

Sump plans

I wanted a 'cryptic area' for the back partition of the cube, however, this was not feasible and i have decided to incorporate it into the sump.

The water will enter a bubble trap baffle and flow out in 2 directions. 1 to the skimmer bay and the other towards the cryptic area. Only a proportion of the water will flow through this area as it will be low flow for light independant filter feeders such as sponges etc to do thier thing. The water will exit the other end of the cryptic area and be returned to the main tank via an Ocean Runner 3500. The water that passes into the skimmer bay will be filtered by a V2Skim 600 then pass through the bubble baffle trap to the ocean runner 3500 to be returned.


Other bits and bobs arrive \0/

V2Skim 600


SCWD

Tank and stand unite!

The tank stand and open top surround were delivered on Sunday, i had to drill in the top of the stand almost immediately so the bulkheads and associated hard piping could pass through. Once that was done the cube was placed on the stand as so .....


This is a comparison of the original CAD drawings and the actual final result


This is a pic of the cube in comparison with my nano

It works!

Preliminary testing the overflow system was promising, the primary overflow didn't make a sound once it was submerged and the secondary overflow kicked into action when i simulated a tube blockage by closing the primary overflow outlet valve (which is nice!)


'Sipping' action of the secondary overflow


These photos show the blockage protection for the first overflow, made out of cable ties and eggcrate.


This is the blockage protection for the second standpipe

Tuesday, March 07, 2006

Installing the overflow piping

The tank was drilled and bulkheads installed with the intention of using Marley piping from B&Q ....... mistake #1! It is very difficult to get anything other than bog standard fittings for the Marley pipe, and I had ordered some 40mm ball valves for the primary overflow ...... needless to say the Marley piping didn't fit the ball valve :(

To solve the problem i turned down the outer diameter of the marley piping and the inside diameter of the ball valve, this lead to a perfect fit, they have been solvent welded together and the join looks as safe as houses.


The left overflow is the primary overflow, eggcrate protects the inlet :) the right overflow is the standby/backup, the 90 degrees knuckle bend is just to keep things neat :)

The middle hole will house the return pipe from the sump, and has been fitted with a reducer so the pump line can be soft piped

Monday, March 06, 2006

Further progress with stand


Neil at
MNS Designs is being very kind and supplying me with progresion pics for the blog :)

Saturday, March 04, 2006

Beginnings of the stand

One of the reasons i didn't buy an AquaMedic Chromis tank (which was my inspiration for a cube btw), was due to its naff stand. i decided to go all out and get a wooden stand built to my own spec. Neil at MNS designs was more than happy to oblige, and has agreed to send me photos of the build as it progresses for my diary.

Here is the most recent pic:-


(it's like seeing an ultrasound of your first newborn! :) )

Testing, testing!

I thought i had better give the seals on the tank a test run (i also wanted to give the Seio pump a run out)

Tank was intact and the seio generates a great flow!

Here is a pic of the tank:-


Here is the Seio in action:-

Adding the back weir

I visited Amari Plastics on the Team Valley and picked up a couple of sheets of 6mm engineer grade, black PVC sheets to make into a weir.

Using the comb size of the AquaMedic over flow comb, i managed to carve the top section of the weir into a decent full length comb.

Tank has arrived

Tank spec = 2ft x 2ft x 2ft cube, with a glass baffle at the rear to act as an overflow compartment. The glass is 10mm thick and the whole think is very heavy!. Took two grown men, making grunting noises, to carry it from the car.

The tank was built by AC Aquatics after recommendation from Coral Island Aquatics. The tank was built to spec in a couple of days, highly recommended!

Anyway it is here and this is what it looks like

Wednesday, March 01, 2006

Bits and bobs start to arrive \0/

To date lighting and water pumps have arrived

250W 14,000K bulb


Lighting unit and ballast


Let there be 250W of light!


Reflectors


Lighting from Marine Lighting (Fast Light)

Seio pump (1100) in action - click pic for video
Here is my plan to date.

Rear view of the tank
A front view giving an idea of the aquascaping
Free Image Hosting at www.ImageShack.us

Images drawn in 'Sketch-up'